This is a review of the QNAP TS-509 PRO
To start off I'd like to say I'm not a professional reviewer, to be honest I haven't written a single one. I love to read amateur reviews, so I decided to make one myself.
I'm also sorry for the quality of the photos, I was using a video camera thats not really made for photos.
Background
I work as IT-administrator at a medium large company, so far we've used tape backup from HP as media for our backup needs. Lately, however our tape station started acting bananas. We had a meeting and people expressed it should be more automatic as well as we want some storage outside the house for more safety (in case of fire for example) and also they wanted to get rid of the tape switching every time we ran backup. I started researching for a box that could do a bit more than just file storage and a lot of people were more than satisfied with the QNAP TS-509 PRO.
I put an order in to buy it, it was about 7700 SEK (~679 EUR) without disks and it arrived 2 days later.I chose to get 5tb of storage for our future needs, we store about 400gb per night as it is now, 5 days a week.
Unboxing
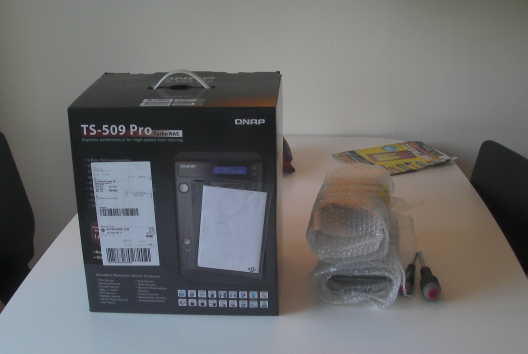
This is what i recieved when I unboxed the ugly brown box. To the right is the hard drives packed very well and to the left is the box itself. Too bad they had to cover the box with shipping info :).
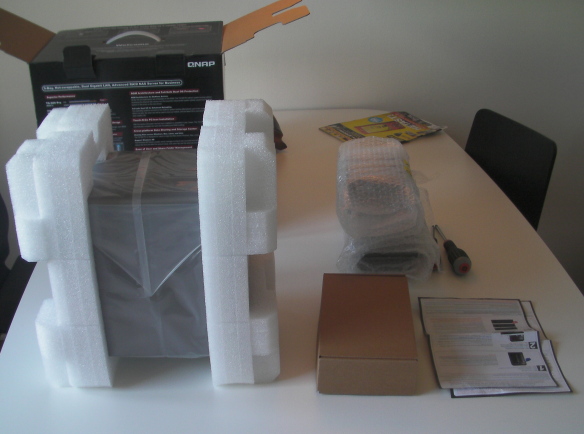
This is what the box contained, there wasn't a lot I have to say! Usually these things are plastered with warranty papers and thick books. This felt simple and nice.
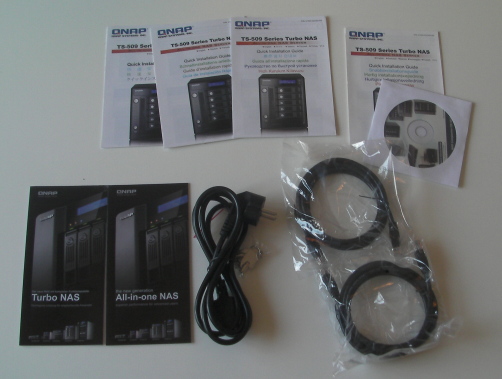
The brown box contained some cables, quick installation guide, screws, power cord etc. Again, not very plastered. the quick installation guide came in a lot of languages.. every book consists of like 5 of them.
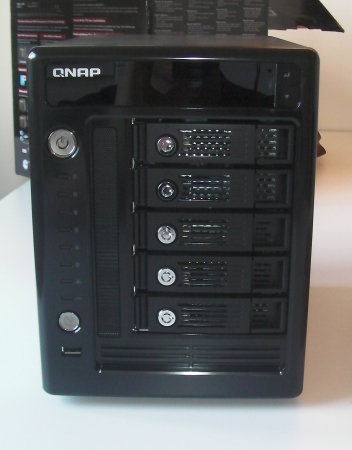
So this is the main front of the box with some LEDS, USB-port, a couple of buttons and HDD-slots. So far the box has a quality feel to it. It's not very "plastic".
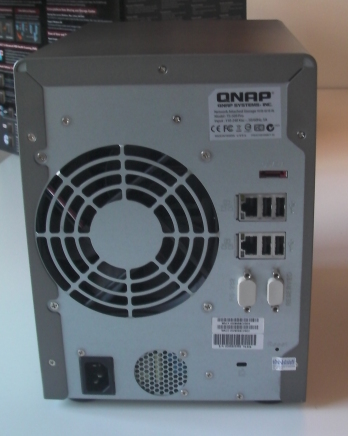
This is the back side as you might have figured out. It has two gigabit ports and four USB-ports. There's also an E-Sata port. There is a big ass fan, they even had to modify the chassi cover for it to fit.

The disks! As I said before i would use 5x 1TB disks.
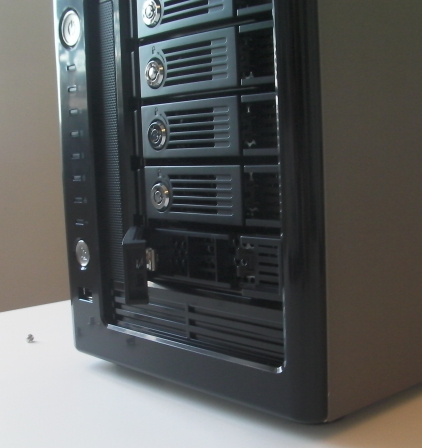
This is how you open it, as you can see it's no rocket science. Per default the bays are open but you can lock them with the keys that comes with. Not that i see anything useful with that, if you really wanted the drives you could just yank them out.. oh well..
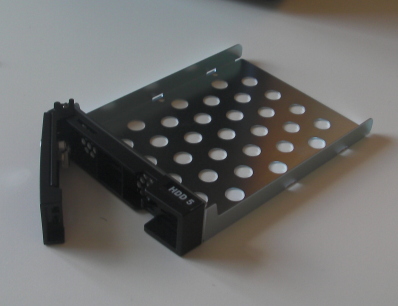
This part is the first part I felt the unit was a bit tacky. These bays are sort of thin and i swear i almost bent one when i was tightening the screws. Anyways you screw the disks from beneath and then you just slide them in as in next picture.
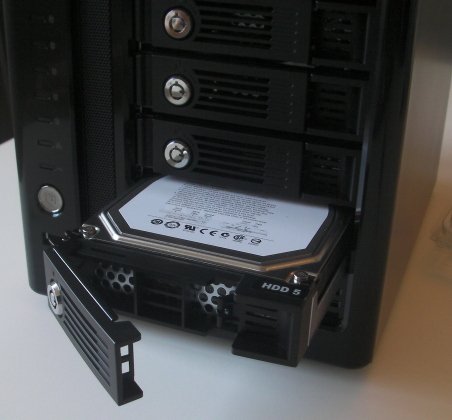
Not much to say, this is what putting it in looks like. You have to give it quite a push for it to click in place however, reminds me of putting DIMMs in.
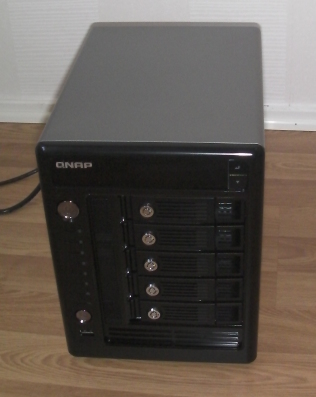
Time to power up! Not much to say here, dirty floor of my bedroom is also nice.
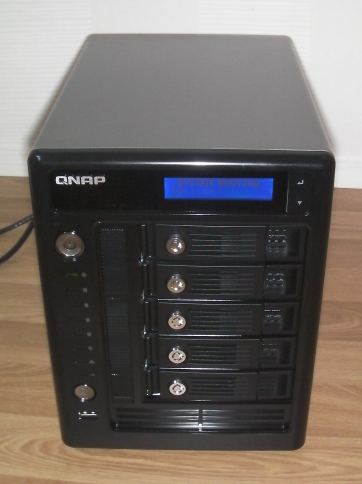
It's booting! It's a miracle!
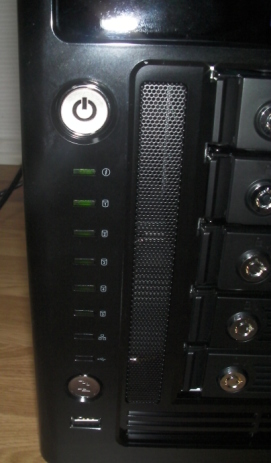
Closeup on leds.. activity on all disks!
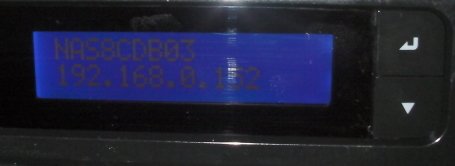
Done! The display can apperently show a lot of stuff but I'm satisfied with seeing the IP and name of the box for now.
Configuring and installing
Time to boot up the software!
This unit uses web interface as configuration, so basically what you're installing from the CD (or web) is the application that finds the unit, you can of course just browse the IP directly in your browser if you want that. I wanted to show you the application for the reviews sake
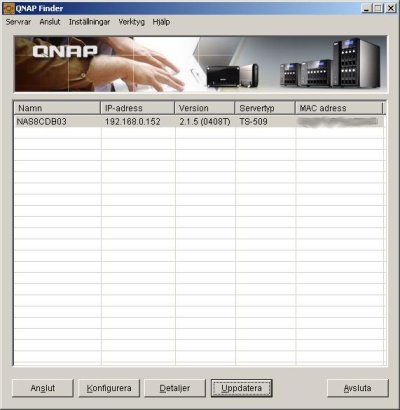
So apparently i chose Swedish without knowing it.. Anyways the bottom is Connect, Configure, Details, Update and Exit.
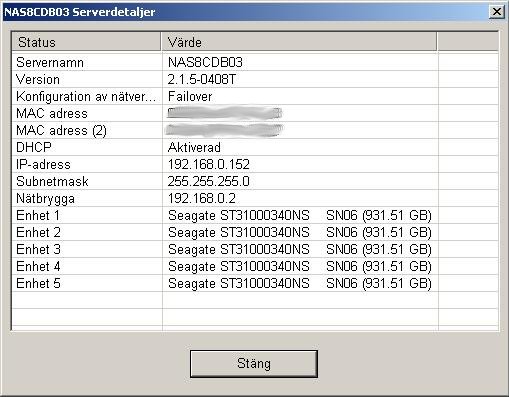
You can view details of the unit, as disks and other settings. Useful if you have very bad memory I guess.
Pressing Configure takes you to a small configure interface where you can set IP, admin password etc.
Pressing Connect opens Internet Explorer (booo!) per default even if my main browser is Firefox.
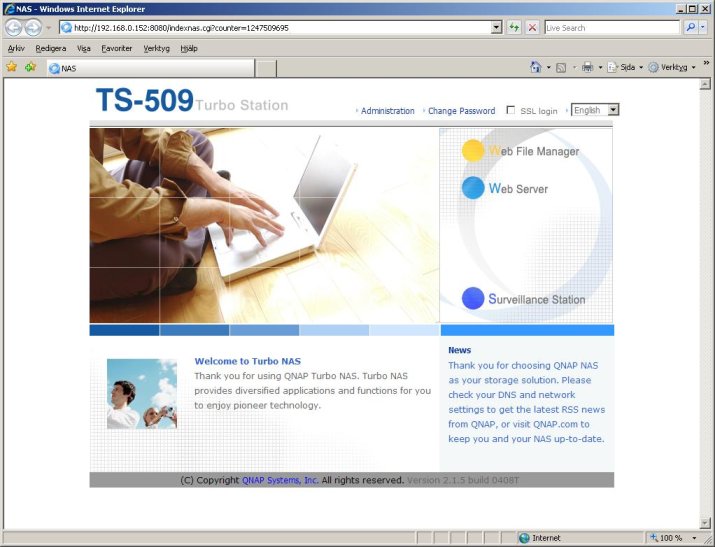
This is the main page where you can do different stuff, looks alright I suppose.
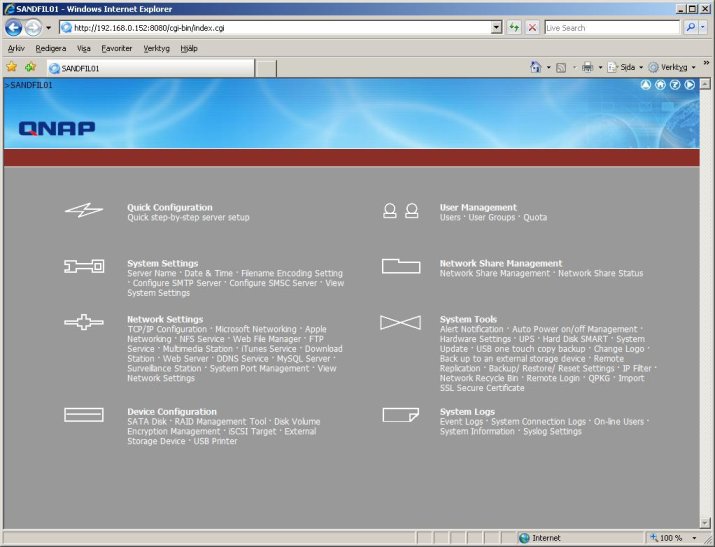
QNAP Configuration page where you can do most stuff. I'm going for Quick Configuration
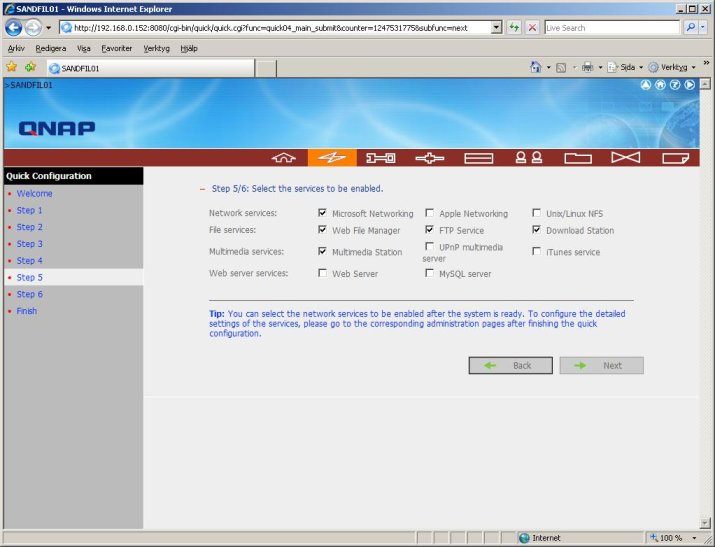
Not much interesting in the quick installation, mostly standard stuff I set up in QNAP Finder until you find this where you can enable/disable services in the unit. I guess this will be useful when i get in to it. For now I don't need much of this so I'll disable some.
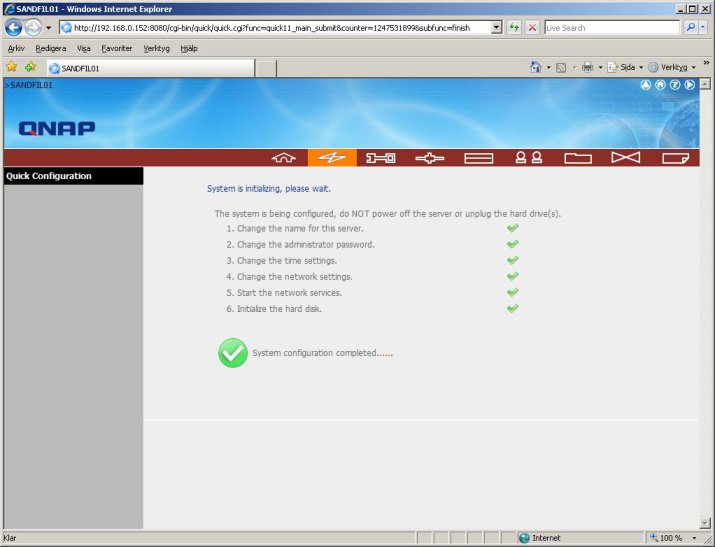
Yay! I'm done with the quick setup. I'm so good..
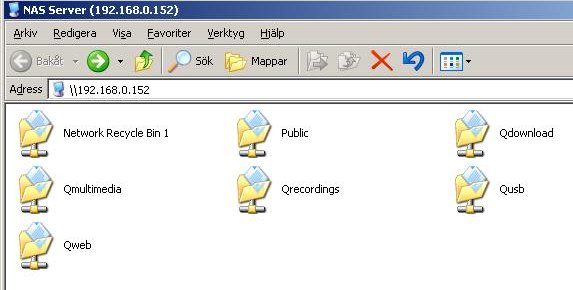
Moving on to configure what I'm really out for. For the time being I'm going to set up a backup to file job that will work over windows shares, later on i might move on to FTP backup. What you see here is the default folders shared. Public everyone can access and dump folders in, which can be useful for a small office where you share folders and dont need to set up advanced rights. Now when I think of it, this unit should be able to talk to Active Directory to set up proper rights on folders? I guess time will tell :-).
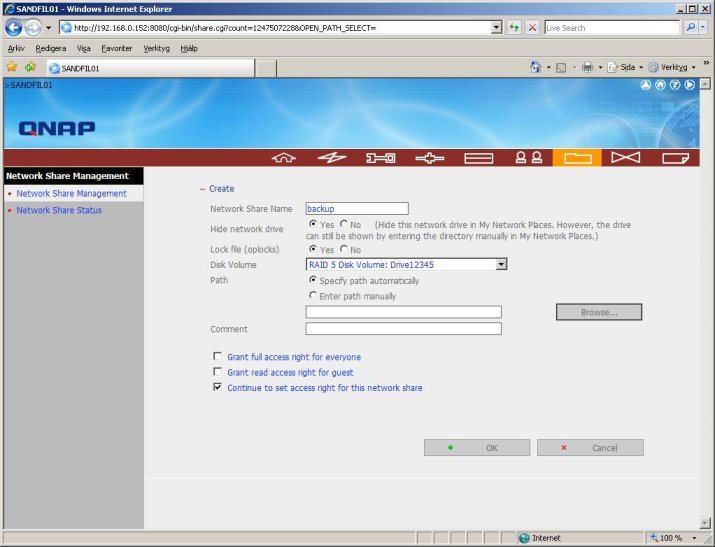
Going back to the config interface I want to set up a new folder with rights for admin only. This is done this way as seen in the picture above, i chose not to give guest access.
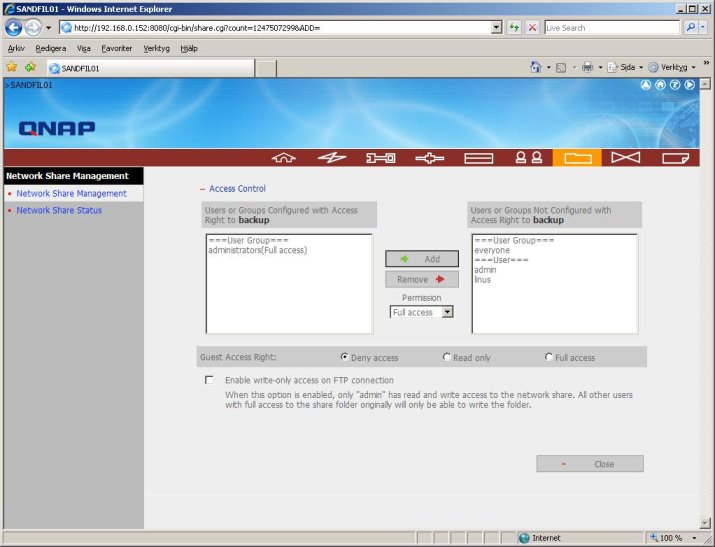
Not much to say here, access rules. It has groups too, which is nice.
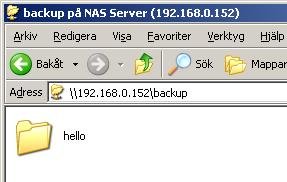
This is what the folder looks like, It can't be seen in regular shares but it can be viewed with admin access.
That pretty much sums up what I will be using this unit initially for, as you can see here I plan to do much more with this unit, hopefully I can remove all sort of file storage from the normal servers to save cpu time and network load.
Summary
My summary after a while of taking pictures and configuring my very basic needs I must say this feels very simple and lightweight to install and get going with. I even think my parents would manage to install and configure this unit for the same purposes. You may wonder how much noise it makes.. Well, it sounds like a very quiet laptop, kind of. Harddrives make noise when they work so that doesn't really change but it's still not a full size computer.
Pros:
+ Easy to mount drives
+ Small
+ A lot of plugins via the QPKG platform
+ Apperently good performance compared to its competitors
+ Looks sort of good!
Cons:
- The interface isn't very pretty, after watching the youtube clip on the official site i bet it can get better but the default one feels very 1995 :)
- I havn't found any connection with Active Directory yet, and since our environment is AD-based it would be lovely for me to not set up all users again.
- It's quite expensive for file storage only, make sure you check out all its features if you want to spend this kind of money.
- HDD bays feels a bit cheap
Total: 4/5


Check out the official site or google for some reviews if you want more info, I'm more than happy to answer if you have any questions
Peace out!
To start off I'd like to say I'm not a professional reviewer, to be honest I haven't written a single one. I love to read amateur reviews, so I decided to make one myself.
I'm also sorry for the quality of the photos, I was using a video camera thats not really made for photos.
Background
I work as IT-administrator at a medium large company, so far we've used tape backup from HP as media for our backup needs. Lately, however our tape station started acting bananas. We had a meeting and people expressed it should be more automatic as well as we want some storage outside the house for more safety (in case of fire for example) and also they wanted to get rid of the tape switching every time we ran backup. I started researching for a box that could do a bit more than just file storage and a lot of people were more than satisfied with the QNAP TS-509 PRO.
I put an order in to buy it, it was about 7700 SEK (~679 EUR) without disks and it arrived 2 days later.I chose to get 5tb of storage for our future needs, we store about 400gb per night as it is now, 5 days a week.
Unboxing
This is what i recieved when I unboxed the ugly brown box. To the right is the hard drives packed very well and to the left is the box itself. Too bad they had to cover the box with shipping info :).
This is what the box contained, there wasn't a lot I have to say! Usually these things are plastered with warranty papers and thick books. This felt simple and nice.
The brown box contained some cables, quick installation guide, screws, power cord etc. Again, not very plastered. the quick installation guide came in a lot of languages.. every book consists of like 5 of them.
So this is the main front of the box with some LEDS, USB-port, a couple of buttons and HDD-slots. So far the box has a quality feel to it. It's not very "plastic".
This is the back side as you might have figured out. It has two gigabit ports and four USB-ports. There's also an E-Sata port. There is a big ass fan, they even had to modify the chassi cover for it to fit.
The disks! As I said before i would use 5x 1TB disks.
This is how you open it, as you can see it's no rocket science. Per default the bays are open but you can lock them with the keys that comes with. Not that i see anything useful with that, if you really wanted the drives you could just yank them out.. oh well..
This part is the first part I felt the unit was a bit tacky. These bays are sort of thin and i swear i almost bent one when i was tightening the screws. Anyways you screw the disks from beneath and then you just slide them in as in next picture.
Not much to say, this is what putting it in looks like. You have to give it quite a push for it to click in place however, reminds me of putting DIMMs in.
Time to power up! Not much to say here, dirty floor of my bedroom is also nice.
It's booting! It's a miracle!
Closeup on leds.. activity on all disks!
Done! The display can apperently show a lot of stuff but I'm satisfied with seeing the IP and name of the box for now.
Configuring and installing
Time to boot up the software!
This unit uses web interface as configuration, so basically what you're installing from the CD (or web) is the application that finds the unit, you can of course just browse the IP directly in your browser if you want that. I wanted to show you the application for the reviews sake
So apparently i chose Swedish without knowing it.. Anyways the bottom is Connect, Configure, Details, Update and Exit.
You can view details of the unit, as disks and other settings. Useful if you have very bad memory I guess.
Pressing Configure takes you to a small configure interface where you can set IP, admin password etc.
Pressing Connect opens Internet Explorer (booo!) per default even if my main browser is Firefox.
This is the main page where you can do different stuff, looks alright I suppose.
QNAP Configuration page where you can do most stuff. I'm going for Quick Configuration
Not much interesting in the quick installation, mostly standard stuff I set up in QNAP Finder until you find this where you can enable/disable services in the unit. I guess this will be useful when i get in to it. For now I don't need much of this so I'll disable some.
Yay! I'm done with the quick setup. I'm so good..
Moving on to configure what I'm really out for. For the time being I'm going to set up a backup to file job that will work over windows shares, later on i might move on to FTP backup. What you see here is the default folders shared. Public everyone can access and dump folders in, which can be useful for a small office where you share folders and dont need to set up advanced rights. Now when I think of it, this unit should be able to talk to Active Directory to set up proper rights on folders? I guess time will tell :-).
Going back to the config interface I want to set up a new folder with rights for admin only. This is done this way as seen in the picture above, i chose not to give guest access.
Not much to say here, access rules. It has groups too, which is nice.
This is what the folder looks like, It can't be seen in regular shares but it can be viewed with admin access.
That pretty much sums up what I will be using this unit initially for, as you can see here I plan to do much more with this unit, hopefully I can remove all sort of file storage from the normal servers to save cpu time and network load.
Summary
My summary after a while of taking pictures and configuring my very basic needs I must say this feels very simple and lightweight to install and get going with. I even think my parents would manage to install and configure this unit for the same purposes. You may wonder how much noise it makes.. Well, it sounds like a very quiet laptop, kind of. Harddrives make noise when they work so that doesn't really change but it's still not a full size computer.
Pros:
+ Easy to mount drives
+ Small
+ A lot of plugins via the QPKG platform
+ Apperently good performance compared to its competitors
+ Looks sort of good!
Cons:
- The interface isn't very pretty, after watching the youtube clip on the official site i bet it can get better but the default one feels very 1995 :)
- I havn't found any connection with Active Directory yet, and since our environment is AD-based it would be lovely for me to not set up all users again.
- It's quite expensive for file storage only, make sure you check out all its features if you want to spend this kind of money.
- HDD bays feels a bit cheap
Total: 4/5


Check out the official site or google for some reviews if you want more info, I'm more than happy to answer if you have any questions
Peace out!

